Well this part of the Baby book starts getting a little confusing so I broke it down to the last basic pages and the first 3 months. You will notice it looks like I took multiple pictures of the same pages. its the inserts I am showing when I did this.
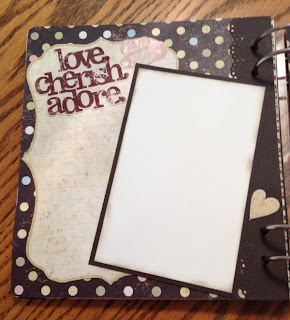
Page 7 Journaling on the side and then the "Love Cherish and Adore" sticker at the top.
Page 8 Last of the standard pages angled this photo mat and added the "Precious"
"Little One" "So Special" Tag but I cut the paper off the edges to allow it not to clash with the swirl paper I wanted to use.
"Little One" "So Special" Tag but I cut the paper off the edges to allow it not to clash with the swirl paper I wanted to use.
Page 7 again but this shows you the chipboard that is in the center of the page
"Look what I can Do"
Page 8 the is the other side of the Chipboard in the center of the pages this side says"Look what I can Do"
"Its all about me" (Im kind of a big deal)
Didn't want to leave out those special inserts that were added.
This is month #1 room for a picture and either journaling here or another picture
these are 2 chipboard tags the top one has space for information
Each of the months says Weight, Length and Milestones
The bottom one has a quote and room for a picture if desired
or to be left alone for just decoration
Depends on the tag as you will see as you go through the whole book.
This one has the tree but I am sure a small picture would look cute here.
This side of the chipboard tags are opposite of the other notice the month one is on the bottom
That is how they all will be the front side the month is on top the back the month is on bottom they are not connected so you could flip them and read then at the same time if you desired. or look at the opposite tags too.... the top tag on this one is more generic and would be more geared for a photo then some of the others in this paper line. love the softness of the hanging hearts here.
Page 10 is now Month 2 for the actual 2nd months photo and some journaling that wasn't included in the chipboard tags or again a photo
Page 11 here is the 3rd month and this tag we added doesn't leave much room for anything but it was just so cute. The flower paper is so sweet. I think its one of my favorites.
the tags here will leave room for some journaling on the month tag but not so much on the quote tag its more just a quote and there because its cute.
Page 12 This one is the 4th month page where we will end today there is room here for a picture and then journaling or a photo.
I hope you are getting a good feel of the book and understanding the concept of it.
When I was starting to play with this paper I was really struggling with the size of some of the pieces we wanted in the book but having them as a part of the book but also putting in pictures was becoming a problem so coming up with adding the tag pages was an option i thought would solve the problem of having our cake and eating it too. It made the book huge but Its amazing.
I promise I will finish up the book in a post tomorrow.
Loves,
Dianne


Comments
Post a Comment